Love them clouds...

Thunder head  

The avid reader of my blog already knows, if a photo from high in the sky shows up after a quiet week that I was on a business trip with very few opportunities for using the camera. I came back from a conference in Dallas, Texas last night. These two photos were made shortly after take-off in DFW and the shape of the clouds indicate we were flying around some heavy weather. What I didn’t knew at this time was that the weather created many flight delays and cancellations. Needless to say that I, of course, was effected and instead of having a two hour stop I spent ten hours in Chicago O’Hare. At least I got home around midnight, other people were not so lucky…


Puffy clouds


Shooting through the window of an airplane can be challenging. Little space, reflections, vibrations, or dirt and moisture on the glass are some of the difficulties you may have to deal with. My window was relatively clean and had only minor scratches this time but dealing with the tint of the glass or plastic isn’t my favorite task in the post process. I still kept it simple and just finished the RAW file in Adobe Lightroom, except for the downsizing and export as a jpeg, which I always do in Photoshop by using pre-recorded actions.

I used the Zeiss 35mm f/2 lens, which can only be focussed manually, but even with any of my AF lenses I would revert to manual focus mode for shooting through two layers of tinted glass. I love shooting clouds and making them the subject of my image. It doesn’t always turn out but it is always worth to try, and hey, there is a delete key on the computer… ;-)


Pemaquid Point Lighthouse - a job for the graduated ND filter

Pemaquid Point Lighthouse  

I wrote in my post from October 16, 2013 that I may show more from Pemaquid Point Lighthouse in Maine. It is such a magic place that allows to shoot from many different angles during sunrise and sunset. Joan and I had the place well inspected the evening before and so I knew exactly where I wanted to place my tripod for this image the next morning. Maine is in clear weather every day the first state that is hit by the morning sun in the United States. Not that it really matters but it was kind of interesting to think about that everybody at home in Iowa was still in the dark of the night, while we enjoyed the warmth of the first sun rays touching the continent. The layered rocks in the foreground are a wonderful mix of metamorphic and igneous rocks, with veins of quartz, and slabs of schist and gneiss.

I used a 3-stop graduated neutral density filter for the photo. This allows me to keep your eye on the lighthouse or maybe let it wander over the rocks in the foreground. The Schneider Optic 77 mm ND.9 SE filter became a very useful accessory during our journey along the Maine coast. I like the optical quality of this piece of glass much better than my older Cokin ND filters. They are made out of resin, which is not a problem, but I always had the feeling that they also shift the colors slightly. Finally, very little adjustments had to be made in Camera RAW for this image and this is how I want to go with my landscape and wildlife photography.


Signs of a great summer

Giant Swallowtail  

I believe we have one of the loveliest summers so far, at least during the nine years since I live here in Iowa. Due to the rain in spring and early summer everything looks lush and green and wildflowers bloom wherever a piece of land is left in a natural state. I complained a little while ago that we didn't have many butterflies this year. It's true, some species have not shown up so far but now we have at least several swallowtails in the yard as soon the sun comes out. I hope you may agree, a Giant Swallowtail on top of a Purple Coneflower tells a great story about a wonderful summer...


Bumble Bee


The swallowtails are not the only insects that get attracted by the coneflowers. Bees, wasps, or Bumble Bees, like the one in this image, enjoy the food this flower provides. I use the Nikon SB600 speedlight together with my self-made softbox to fill in some light and overcome harsh shadows. The speedlight is mounted on a tripod and connected to the camera with a Nikon SC-28 spiral cable. (If you like to see how this softbox looks like, feel free to click HERE. The link opens in an older post where I introduced this useful piece of equipment.) In order to follow the fast moving insects the camera is handhold and I have of course to stay within the range of the cable. It is important to have the flash off camera because of the short distance between your lens and the subject. I usually concentrate on one group of flowers so I don't have to reposition the speedlight all the time. It spills enough light even if it is not always 100% directed to the flower with the insect of interest. Using the cable allows me to take full advantage of the TTL-capabilities of the flashlight. Are there better ways to shoot close-ups or macros? Of course, there is a lot of gear for macro photography available but for someone like me, who shoots it only occasionally, it doesn't make sense to invest in more expensive light solutions. The way I do it works for me and the important thing is anyway to go out, make the click, and have fun shooting the signs of a great summer...


Brown Thrasher captured with SB600 and Better Beamer flash extender

Brown Thrasher  

We had the third rainy day in a row and our original plans to use the kayaks during this holiday weekend had to be dumped. The canopy of leaves doesn't let much light coming through anymore and so it was the right decision to take the SB600 flashlight and Better Beamer flash extender with me when we went for a hike on the Heritage trail this afternoon. For those who are new in my blog, the Heritage trail is on an old abandoned railroad track that ones connected Chicago with St. Paul in Minnesota. It follows the Little Maquoketa River just north of Dubuque, Iowa and is a great trail for all kinds of recreation, including nature photography. Because of the weather all the bicycle riders and runners that are usually on the trail stayed home and we had it all for ourselves.

We saw several warblers, Indigo Buntings, and American Redstarts again and the young eagle that we discovered recently in a nest has grown quite a bit. The best shooting opportunity came shortly after we started our little hike. For the second time this year a Brown Thrasher showed up in front of the lens. You can click HERE for the older post about this bird. I would not have been able to make this photo without the flashlight and flash extender attached to it. I don't care how far I have to carry the equipment. If at the end of the day one image that I like is on the flash card , I know it was worth the effort...


Nature clicks #166 - Ruby-throated Hummingbird

Ruby-throated Hummingbird  

I easily could blame the rainy weather of the last few days for not shooting as much as lately but I actually believe that rain creates a lot of possibilities to make some good nature photography. The truth is that I had a busy work schedule and also have been working on a photography project that I will reveal here shortly.

As every year the Ruby-throated Hummingbirds showed up by the end of April. They never arrived later than May 2. We have several feeders placed around the house but they are also feeding on the blossoms of flowers and bushes that Joan has planted already years ago. The males are very territorial at the moment and sit on a small branch or like in these images on the wire that will very soon covered by the ranking vine that rapidly climbs up the balcony.


Ruby-throated Hummingbird 2


One of the advantages having them so close to the house is that I can use my Sigma 150/f2.8 lens. It delivers a tack-sharp image if properly handled and is my favorite lens to shoot hummingbirds. I made several sharp images of the birds hovering at the feeders but was not able to keep the feeder out of the frame and so they will not make it into the blog. The season is still long enough to work on this and hopefully I can present some more images of the tiniest bird we have here in Eastern Iowa.


Sigma 50-500 F4.5-6.3 APO DG HSM OS

Test shot House Finch  

No, I didn't buy a new lens but I had a chance to test the Sigma 50-500 F4.5-6.3 APO DG HSM OS with optical stabilization (OS). My photography friend Dave Updegraff owns this lens and yesterday we tried to replicate a problem that he had experienced several times before with this lens. The lens sometimes stopped working in very low temperatures, which is very annoying if you are out and like to shoot Bald Eagles or other birds in the winter. Well, we were not able to make this happen at our house even after leaving the lens outside in the cold for about twenty-five minutes. It worked flawless on my Nikon D300s and as well on his D3. Finding out that the lens was often stored in his car near the heat inlet made me believing that we see a problem (ok, we didn't see it yesterday :-)  ) created by heat, moisture and a following temperature shock that makes the lens freeze up. Time will tell, if by putting it to a different place in the car while driving the problem can be solved. I would be very happy to hear that from Dave. If not, well, I'm out of other ideas at the moment.

Dave had also asked me about my opinion regarding the sharpness of his Sigma 50-500. I took quite a few test shots using the same set up that I used during the last few weeks for my own bird photography. This gave me the chance to compare the performance of his lens directly with my previous results. Here are my impressions.


Testshot squirrel


The Sigma 50-500 with the OS feature delivered the same good results if it was mounted on the tripod, using the gimbal head, and the optical stabilization turned off. I had the feeling (not sure) that the lens responded a tad faster to the autofocus than my older lens. Not every image was sharp because birds chew on seeds or move around fast and sometimes there is just not enough time for the autofocus to detect contrasty edges. This is not unusual and I call it pilot error (the pilot being me :-) ). The photo of the House Finch here may serve as a proof for my first statement.


Test shot squirrel 2


We stepped outside and I made some more clicks, this time handhold, without the aid of a tripod, and the optical stabilization turned on. What a difference to my old lens! Without any preparation or "warm up" I was able to create some sharp images of the Eastern Gray Squirrel, who in great numbers occupy the bird feeders in our yard. Squirrels are not always easy to shoot because of the lack of contrast on their fur (unlike a woodpecker) and I was positively surprised how much the optical stabilization helped here to get the image sharp. To be honest, I wished I had waited a few months longer with my purchase until Sigma introduced the OS feature on the 50-500. I still think it is a great lens for those of us that have a limited budget.

Beside all the lens and camera talk Joan and I have enjoyed the conversation beyond photography with Dave. It was time well spent and now I just hope that we found the cause for the freeze up of the lens.


Warning: test shots only ;-)

American Robin  

The avid reader of my blog may ask why I post a picture today that is way below my usual quality standards, except for the light, which I think is good. As you can see the photo has an awful distracting background, branches hanging all over the place, and the bird is placed almost dead center. Well, there wasn't actually a plan to post an image today but here is why you have to put up with this.

My Sigma 50-500 / 4.5-6.3 APO EX DG HSM lens came back from a necessary repair job today and I wanted to test it while there was still a little bit light outside. In order to test the focus accuracy of the lens I shot about 200 pictures, mostly static stuff (our satellite dish in the yard is a perfect subject for test shots ;-)  ).

Back in the house I suddenly saw a flock of American Robins foraging in our woods. They literally turned every leaf on the ground upside down. This confirms an observation we made several times already during the last few years, the robins don't migrate very far south in the winter. It is cold here but most of the snow has melted over the weekend. Obviously this is enough for the American Robin to move back into the area here. However, it felt a little like spring already and I enjoyed watching them.

As I mentioned the light quality wasn't bad and I set up the tripod in my "bedroom blind" and made some more test shots with the birds as the subject. For the sake of comparison I used the center AF sensor of the D300s only. And this is why the bird sits almost dead center in the frame. I cropped the image slightly on the left and bottom side to make it a little more pleasing. The photo was made at 500 mm, 1/125 sec, f8, -0.5EV, and ISO 800. I usually don't use such a high ISO setting for my wildlife photography but pushing the limits, while making test shots, is a good way to find out where the limits really are in order to be prepared for a future "ones in a lifetime" click. Stay tuned for better stuff to come ;-)...


2012 – Looking back, part 10

American Pika  

I have posted several times this fall about our visit in the Rocky Mountains. I still have images that haven't been shown in either of my galleries. Can't resist to show you the American Pika again today because I just watched a documentary about the effects the warming of the earth has on this little critter. It is not easy to get really close to the pika but this photo shows their natural habitat, the boulder-covered hillsides above 8,000 feet altitude.


Golden-mantled Ground Squirrel


The other animal is a Golden-mantled Ground Squirrel. It was on the watch, not far from the trail on a grassy hillside. It almost seemed to pose for us... ;-)

The background in the pika picture has natural lens blur that separates the animal from the background nicely. Not as good as with a fast and much more expensive f/2.8 or f/4 lens, but the Sigma 50-500 f/4-6.3 still delivers a decent result here. The grassy background in the squirrel picture was much more distracting and so I used a blur filter in Photoshop to improve the result in the upper part of the photo. Still not perfect but I believe it is a feasible solution to work around the limitations of this lens.


SIGMA 50-500mm / f4.5-6.3 APO DG HSM, after more than two years

Red-bellied Woodpecker

Sometimes I become frustrated if the results of my wildlife photography don't reflect what I saw through the viewfinder. It is always easy to blame the gear, in particular the lens. I can tell you, I had a long learning curve with my "work horse", the SIGMA 50-500mm / f4.5-6.3 APO DG HSM. I wrote a post about this lens shortly after I bought it more than two years ago. This post is the one that received the most clicks in my blog up today. It tells me that a lot of other photographers consider to buy this lens. Today, several ten thousand clicks later after I bought the lens I believe I have a much better feeling what this lens can do for my photography and where the limits are. I like to share my thoughts with you and if it helps you to make the right decision what lens to buy I will be happy.

First let me remind you, I do not own the Sigma 50-500 with optical stabilization (Sigma calls it "OS"). This feature came out shortly after I bought mine. You probably will have a benefit by having image stabilization, especially if you try to handhold the lens without any other support. Second, I like to mention that my blog is free of advertising and that I don't get a penny for writing good or bad things about Sigma or any other brand. And last my experience with this lens is mainly based on wildlife photography. A sports photographer may have different things to say.

 Here is what I gained during the last couple of years:

- The SIGMA 50-500 is a heavy lens. If you plan to walk around for long periods of time with your camera and this lens attached and if your physical strength is limited, this may not be the right lens for you. There is a reason that it is called "The BIGMA".

- The lens is robust built. It does not have a cheap "plastic feeling". The zoom and focus rings work smooth and have a good resistance for fine tuning. The zoom can be locked at the 50mm focal length but as soon it is unlocked the lens will creep all the way to 500mm if carried vertical. A rubber band (O-ring) over the gap between zoom ring and lens barrel helps to prevent the lens creep.

- The tripod collar is sturdy and much better than on a Nikon 80-400 I had tried before.

- The lens hood sits very stabile and doesn't fall off as seen on other lenses I own.

- The Sigma 50-500 needs a very good support for shooting wildlife. The first few months I mounted it to a KIRK ball head on top of my tripod. I do not recommend this. My results improved tremendously after I started using a gimbal head for the lens. I now use an INDURO GHBA in combination with the KIRK BH3 ball head. A much more expensive gimbal head will be most likely even better. However, the GHBA works well for me and you don't have to break the bank.

- A good and stabile tripod is essential. Don't blame the lens if you work with a set of tripod legs that is not designed for this kind of weight.

- The SIGMA 50-500mm / f4.5-6.3 APO DG HSM is a slow lens. The maximum aperture of f/6.3 @ 500 mm requires a lot of light in order to maintain a fast shutter speed. If you are new to long lens shooting technique try to make your first thousand clicks in real good light. Try to keep the ISO setting at a low number (100, 200). Good light will allow you to shoot with a fast shutter speed and the low ISO setting prevents you from  dealing with noise. Any noise reduction in post process will reduce sharpness up to some degree. This way you will learn that your lens is capable of making sharp photos.

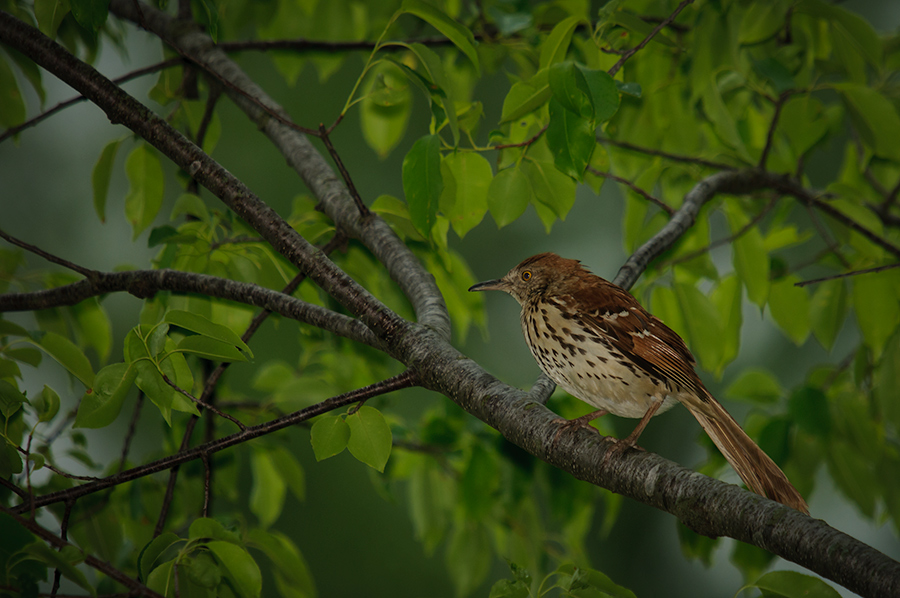
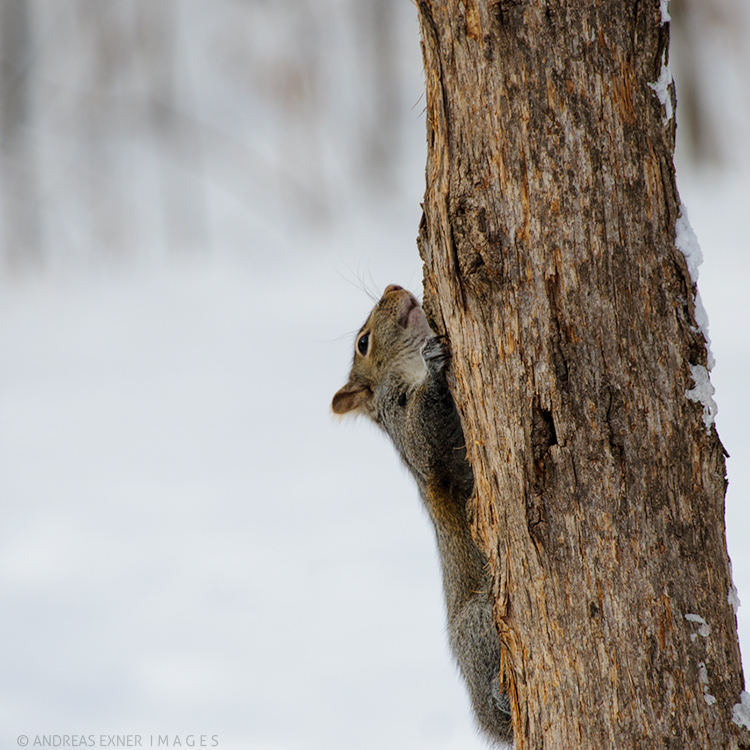
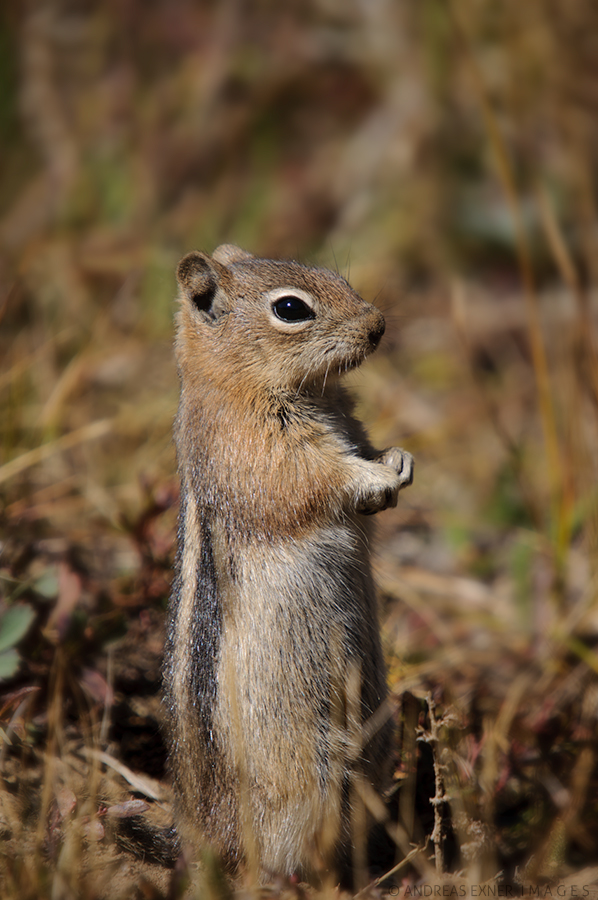
- If you make your first steps with a long lens, look for animals or subjects with a good contrast. Learning how to focus and how to keep the autofocus sensor on the animal's eye or chest works definitely better on a subject with contrasty edges, like the woodpecker above. Shooting a pair of Sandhill Cranes in the reeds (as posted a few days ago) is much more difficult because of the lack of contrast.

- Watch the background. With f/6.3 @ 500 mm you will not always get the same nicely blurred background like with a Nikkor 400/f2.8 or 500/f4. Shooting with a well chosen background can make a big difference. In general, you may have to do a little more work in post than the people that own the more expensive glass. Face it, that's the price you pay for buying the less expensive lens.

- I personally like to keep the ISO low in order to get as much detail as possible for my wildlife photography. I usually dial in between -0.5 and -1.5EV exposure compensation. This buys me also a faster shutter speed and can make the difference between getting and not getting the shot.

- The SIGMA 50-500mm / f4.5-6.3 APO DG HSM is a lens that is capable to deliver sharp images. Period. Don't get frustrated just after the first 500 shots. It is essential that you learn all about long lens shooting technique. The best source I know for that is the website of famous wildlife and aviation photographer Moose Peterson. There is a link to his blog on the left hand side under "Blogs I follow". Search for his videos where he teaches everything about using a lens with long focal length. You will not regret!

I hope this will give all of you, who are looking for answers of the question "Is this the right lens for me?" a little help to make your decision. Please drop me a note if this blogpost was helpful or if your experience with the Sigma 50-500 is different from mine.

February 2013: I had a chance to shoot with a newer version of this lens that had the optical stabilization (OS) feature. Please feel free to click HERE if you like to read my thoughts about it.

Sunday morning with the Downy Woodpecker

Downy Woodpecker
Nikon D300s, Sigma 50-500mm / f4.5-6.3 APO DG HSM

Circumstances were not in my favor this weekend and except for a few clicks around the house Sunday morning I got nothing done. Nature's best reflector, the snow on the ground, was out again and made for some pretty good light. I counted five Downy Woodpeckers here today, which means they all made it through the winter so far. Good news, but not really surprising because of the mild weather we had during the last few months. The image was made from the tripod with my KIRK ball head and INDURO GHBA gimbal head attached. This combination has served me very well in the past and is a good solution for an amateur with limited budget like me. I tried something different today and mounted the gimbal head to the left hand side of the lens. It is a little more difficult to rest the left hand on the lens barrel while shooting but for some reason my keeper rate was very high today. It may have been just the good light which made focussing easy but maybe it is a way that works better in general for me. I will try more and find out about it. I made many, many pictures of the "Downy" before but I always enjoy working the smallest woodpecker that we have here. They hardly sit still but are not as skittish as, for example, the Red-bellied Woodpecker, and make therefor for a good subject to practice long lens shooting technique.